On the “Home” page, you can open the logbook form by clicking
- on one of the buttons in the header (Theatre, ICM, ED, Event),
- on the red floating button in the bottom right corner or
- on a date in the “calendar card”.
When the form opens, you can see three icon buttons on the right.

The first button with the ”Help” icon will show frequently asked questions within the form fields.

The second button will duplicate the previous case. This is useful when you are adding multiple similar cases, such as elective caesarean sections or if you are doing an ECT list.
The last icon will open the settings for the form. You can delete custom items you saved, disable the “Intensive Care Medicine” or “Emergency Medicine” forms. You can also toggle the following form fields: duration, supervision & supervisor, position, analgesia and labels.
General features
Some form fields will have red items. These are compulsory fields and have to be filled out before you can submit the form.
Once you have selected an item, it will turn blue and may have round or squared corners. Items with round corners are radio buttons so you can select only one item from the list. items with squared corners are checkboxes and you can select more than one item from the list.

The app will show you the most relevant items for a given speciality/category. When more items are available, you will see an arrow button. Click on the arrow button to expand the list and show all items.

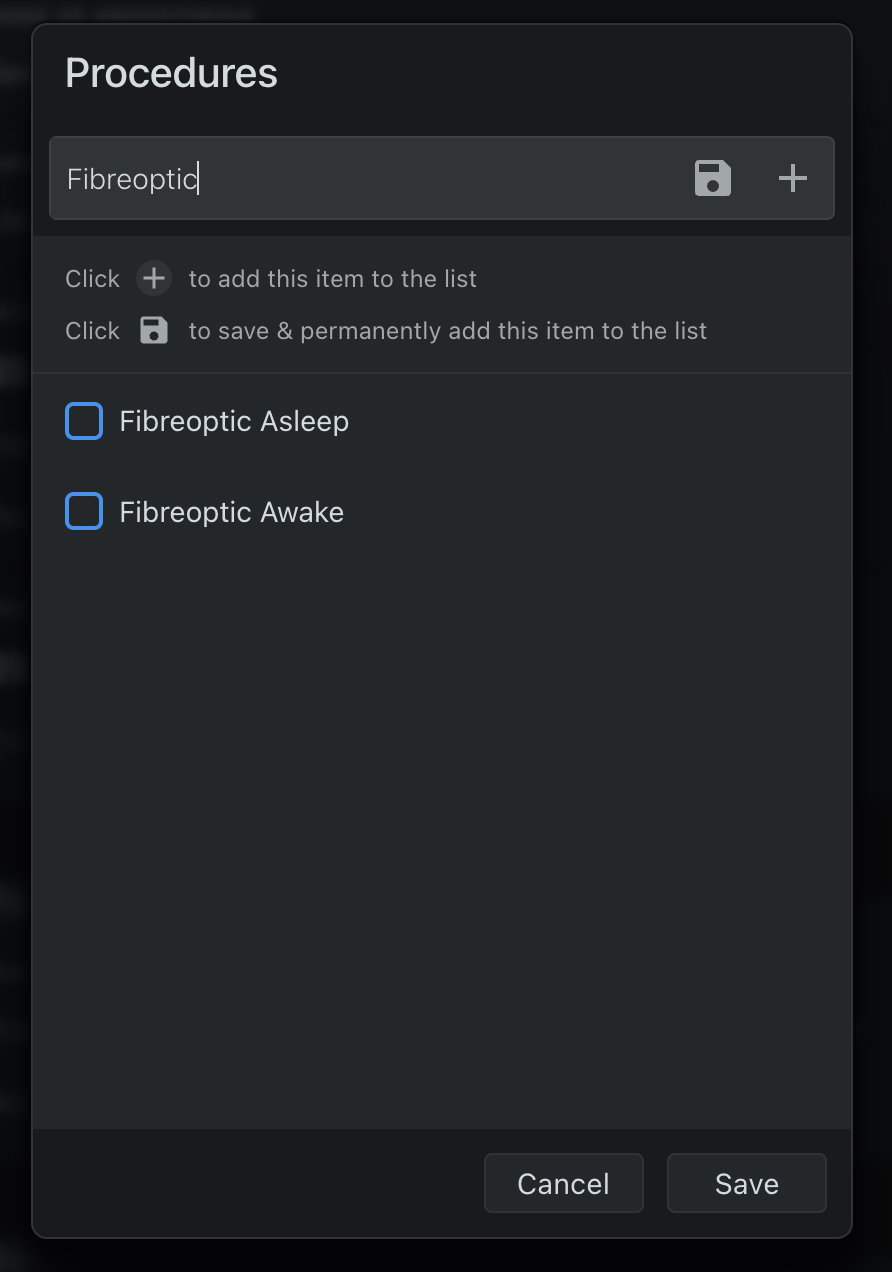
Most form fields allow you to add custom items and you will see a ”keyboard” icon. Clicking on the icon will open a dialog box that will show you a list of all items. Use the input box to filter items from the list or to add a custom item not in the list.
To add a one-off custom item, press the “Plus” icon. To permanently add the custom item to the list, click the “Save” icon in the text box. Saved custom items are synchronised across devices. You can delete saved items again in the settings. Once you are done, click “Save” which will close the dialog box.

Date and Time
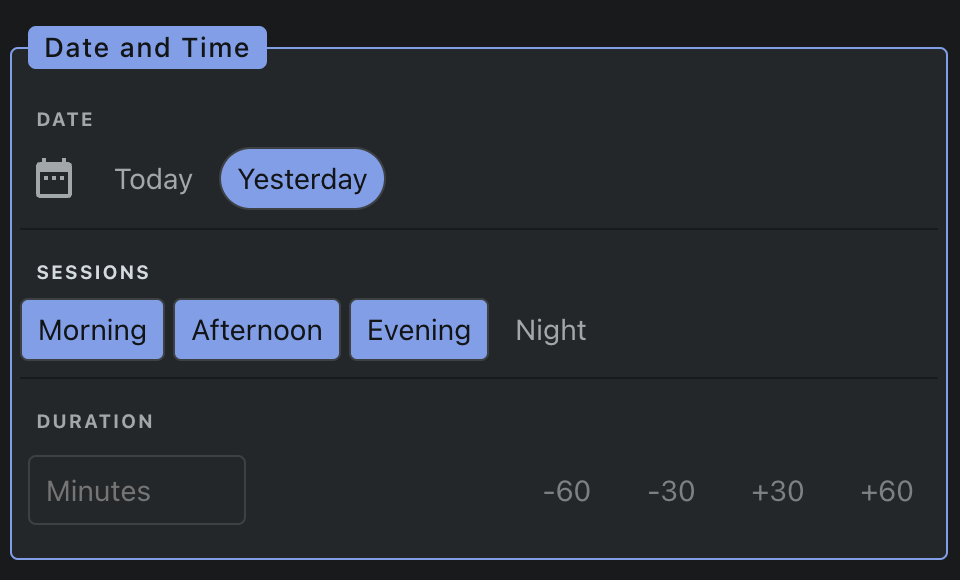
You must select at least one session from the Sessions form field. Selecting multiple sessions is relevant when a theatre case or an event lasted more than one session. Click on the help icon to reveal the start and end times for each session.
You don’t have to select multiple sessions, but this is done in the RCoA Lifelong Learning Platform to track your number of sessions. Therefore, we recommend that trainees always select multiple sessions when applicable to be compliant with the Annual Review of Competences (ARCP).
In the theatre form, you will find the duration form field. Although optional, we strongly recommend you use this form field as it’s being used when generating your reports (for example, to calculate case complexity).
Datalist
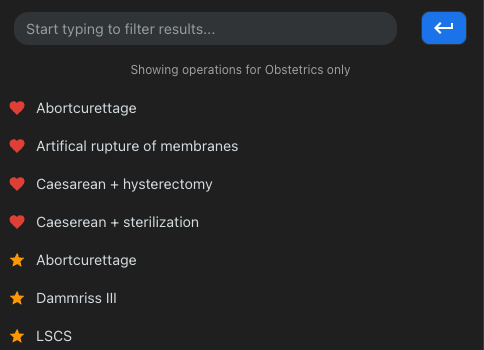
All forms have a datalist form field (operation in the theatre form, diagnosis in ICM & EM forms, name of event in the event form). A datalist comes with a short list of suggestions. Those are recommended or commonly used items based on the category selected.

Click on the form field to open a list of all available items. The list contains items provided by the app but will also show your own items. Items will permanently appear in the list once you have added them at least twice.
Starred items pinned at the top are frequently used items in the app and may change from time to time. You can pin your own items to the top of the list by clicking on the “heart” icon. Click on the icon again to remove it from the top.

Teaching and Training
If you have selected “Consultant” as your role in your workplace, you shouldn’t see the “Supervision” and “Supervisor” fields, as they are irrelevant. Users from other countries or senior SAS grade doctors can disable the supervision form fields in the settings.
Details
When you use the ”Notes” box, make sure you don’t input sensitive data, such as hospital number or other identifiers. Be careful not to add clinical information that will allow identification of the patient, unless you have written consent.
The ”Labels” form field in the “Theatre” form is important as items listed are used to calculate case complexity. You can also add your own labels to help you find your cases later on.
The ”Hospital” form field shows the hospitals listed in your current active workplace. You can only select hospitals in the “Theatre” form. Clicking the arrow button will show hospitals from your previous workplaces. It’s useful when adding cases retrospectively.
Do not select a hospital if you are entering rare or sensitive patient data as it may allow identification of a patient. If someone steals your data, an attacker may be able to identify a patient from the date, hospital and incident form fields when “Malignant hyperthermia” was entered.
At the bottom you will find tags. Tags make it easier to find cases by using the “Filter” option on the “Cases” page.
- Use the ”Draft” tag if you want to edit your case later on.
- ”Reflection” can be used if you wrote a reflective piece into the notes textbox.
- The ”Follow up” tag is useful when you have done a nerve block and want to see the patient the next day to document the outcome or any side effects.
- Consultants can enable a ”Private” tag in the workplace. It will allow consultants to separate their NHS work from cases done at private hospitals.

Theatre form
A common question is what to do with labour epidurals. We recommend to enter “Labour analgesia” as the operation and then you can select Epidural Lumbar from the regional form field. For priority put “Urgent”. Consultants may also add them as a standalone procedure on the “Event” form. We don’t recommend doing this for trainees as standalone procedures won’t show up when you are generating an “Obstetrics” report for your obstetrics module.
When selecting your speciality, use “Resuscitation” for patient transfers, cardiac arrest calls or resus calls in ED. Some people are using the ED form for patients in resus, but note that the form is still under development. If you have simulation study days, you can select “Simulation” as a speciality and add your reflection or learning points to the notes box. Use the “Trauma” speciality for major trauma in A&E. For cases on the orthopaedic trauma list, select “Orthopaedic” as your speciality. You can differentiate between an elective and trauma list by looking at the priority.
Why is there no Paediatric speciality? The logbook automatically tags cases as “Paediatric” when an age less than 16 years is entered. This allows you to select the actual speciality of the case (ie General, Orthopaedics) whilst still being able to generate reports for paediatric surgery. To view paeediatric cases on the “Cases” tab, use the “Filter” button and select “Modules” => “Paediatrics”. To generate specific reports, go to the “Export” tab, scroll to the “PDF File” card and change “All modules” to “Paediatrics”. You can also change the default age groups and create your own!
Mode of anaesthesia refers to what you use for maintenace (ie TIVA or volatile). Do not use this form field for induction of anaesthesia. If you want to log a gas induction, select this from “Procedures”. We feel there is no need to log IV indution as this is the most common form of induction for most.
Intensive Care Medicine (ICM)
The form is designed to enter details for one patient. Standalone procedures and lead ward rounds (as Direct Clinical Care) can be added by using the “Event” form.
You can specify the organ support of your patient. When you select an item, it will show advanced options for the “Respiratory”, “Cardiovascular” and “Neuro” items. These are all optional. To input that a patient was on a noradrenaline infusion, select “Cardiovascular”. Select “Renal” support if your patient is on dialysis and liver support for patients with acute liver failure.
Emergency Medicine (EM)
Use with care, this form is experimental may still change.